mmdebstrap を使った小さな Ubuntu 22.04 インストール方法
mmdebstrap を使ったUbuntuインストールする方法を記載します。実際はインストールメディア(DVD/USB)が必要となるため、作業の時には手元に用意する必要があります。
環境
以下を必要とします。
- Ubuntu 22.04 インストールメディア
- インストール対象の外付けストレージ(インストール終了時に 2GByte 程度消費します)
- インターネット環境(mmdebstrapでネットワーク越しにダウンロードするため)
- インストール済み Ubuntu 22.04 本体(mmdebstrapを実行する環境です)
パーティション作成 (インストール済み Ubuntu でコマンド実行①)
手順中では基本的に sudo を使用します。sudo のパスワード入力については省略して書いています。
- パーティションを作成する
parted を使って外付けストレージのパーティションを作成します。1番目のパーティションはgrub用、2番目のパーティションをルートファイルシステムとします。
$ sudo parted /dev/sdb print
Error: /dev/sdb: unrecognised disk label
Model: ATA SSD (scsi)
Disk /dev/sdb: 5369MB
Sector size (logical/physical): 512B/512B
Partition Table: unknown
Disk Flags:

$ sudo parted /dev/sdb mklabel gpt
Information: You may need to update /etc/fstab.

$ sudo parted /dev/sdb print
Model: ATA SSD  (scsi)
Disk /dev/sdb: 5369MB
Sector size (logical/physical): 512B/512B
Partition Table: gpt
Disk Flags:

Number  Start  End  Size  File system  Name  Flags

$ sudo parted /dev/sdb mkpart boot 1 2
Information: You may need to update /etc/fstab.

$ sudo parted /dev/sdb mkpart root 2 100%
Information: You may need to update /etc/fstab.

$ sudo parted /dev/sdb print
Model: ATA SSD  (scsi)
Disk /dev/sdb: 5369MB
Sector size (logical/physical): 512B/512B
Partition Table: gpt
Disk Flags:

Number  Start   End     Size    File system  Name  Flags
 1      1049kB  2097kB  1049kB               boot
 2      2097kB  5368MB  5366MB               boot

$ sudo parted /dev/sdb set 1 bios_grub on
Information: You may need to update /etc/fstab.

$ sudo parted /dev/sdb print
Model: ATA SSD (scsi)
Disk /dev/sdb: 5369MB
Sector size (logical/physical): 512B/512B
Partition Table: gpt
Disk Flags:

Number  Start   End     Size    File system  Name  Flags
 1      1049kB  2097kB  1049kB               boot  bios_grub
2 2097kB 5368MB 5366MB boot- 外付けストレージのフォーマットとマウント
ルートファイルシステムを ext4 でフォーマットした後で /mnt へ mount します。
$ sudo mkfs -t ext4 /dev/sdb2
mke2fs 1.46.5 (30-Dec-2021)
Creating filesystem with 1309952 4k blocks and 327680 inodes
Filesystem UUID: e45cf270-b938-4b1e-a39b-b812b38a6583
Superblock backups stored on blocks:
        32768, 98304, 163840, 229376, 294912, 819200, 884736

Allocating group tables: done
Writing inode tables: done
Creating journal (16384 blocks): done
Writing superblocks and filesystem accounting information: done

$ sudo mount /dev/sdb2 /mnt
mmdebstrap 実行(インストール済み Ubuntu でコマンド実行②)
mmdebstrap を実行します。mmdebstrap のパラメータについては別の機会に紹介しますが、variant=minbase, include=apt として、後から apt が実行できる最小構成としています。
もし mmdebstrap がインストールされていない場合は apt install mmdebstrap を実行してインストールしてください。
$ sudo mmdebstrap --variant=minbase \
--dpkgopt='path-exclude=/usr/share/man/*' \
--dpkgopt='path-exclude=/usr/share/locale/*/LC_MESSAGES/*.mo' \
--dpkgopt='path-exclude=/usr/share/doc/*' \
--include=apt jammy /mnt
上記を実行するとダウンロードとパッケージの展開を開始し、最終的に以下のログを表示していたら成功です。
I: automatically chosen mode: root
I: chroot architecture amd64 is equal to the host's architecture
I: automatically chosen format: directory
I: running apt-get update...
done
I: downloading packages with apt...
done
done
I: extracting archives...
done
I: installing essential packages...
done
I: installing remaining packages inside the chroot...
done
done
I: cleaning package lists and apt cache...
done
done
I: success in 80.0744 seconds
細かな設定(インストール済み Ubuntu でコマンド実行③)
mmdebstrapだけでは起動すらできません。これから chroot で最初にログインできるまでの設定を行います。
- 設定準備
最初に chroot の前準備と chroot を行います。
$ sudo mount --bind /proc /mnt/proc
$ sudo mount --bind /dev /mnt/dev
$ sudo mount --bind /sys /mnt/sys
$ sudo chroot /mnt
root@UbuntuText:/#
chroot の前の mount –bind から始まるコマンドは chroot 後にもデバイスが正常に動作できるようにするために行います。それを以下のコマンドで確認します。
root@UbuntuTest:/# df -h
Filesystem      Size  Used Avail Use% Mounted on
/dev/sdb2       4.9G   82M  4.5G   2% /
df の実行結果が正常に表示されていれば正常に動作しています。もし何も表示されていないなどの状態であれば、chroot 前の実行結果を確認してください。
- root パスワード
rootパスワードを設定します。練習用なのでパスワードも root としました。実運用の時はランダムな文字列を設定してください。
root@UbuntuTest:/# passwd
New password:
Retype new password:
passwd: password updated successfully- linux カーネルイメージのインストール
これから apt を使ってカーネルイメージのダウンロードと展開を行います。最初に apt を更新します。そしてその apt でカーネルイメージをインストールします。
root@UbuntuTest:/# apt-get update
Get:1 http://security.ubuntu.com/ubuntu jammy-security InRelease [110 kB]
Get:2 http://archive.ubuntu.com/ubuntu jammy InRelease [270 kB]
Get:3 http://security.ubuntu.com/ubuntu jammy-security/main amd64 Packages [1192 kB]
Get:4 http://archive.ubuntu.com/ubuntu jammy-updates InRelease [119 kB]
Get:5 http://archive.ubuntu.com/ubuntu jammy/main amd64 Packages [1395 kB]
Get:6 http://security.ubuntu.com/ubuntu jammy-security/main Translation-en [217 kB]
Get:7 http://archive.ubuntu.com/ubuntu jammy/main Translation-en [510 kB]
Get:8 http://archive.ubuntu.com/ubuntu jammy-updates/main amd64 Packages [1412 kB]
Get:9 http://archive.ubuntu.com/ubuntu jammy-updates/main Translation-en [277 kB]
Fetched 5503 kB in 3s (1635 kB/s)
Reading package lists... Done

root@UbuntuTest:/# apt-get install linux-image-generic
Reading package lists... Done
Building dependency tree... Done
Reading state information... Done
The following additional packages will be installed:
  amd64-microcode busybox-initramfs cpio dbus dmsetup gettext-base
  gir1.2-glib-2.0 grub-common grub-gfxpayload-lists grub-pc grub-pc-bin
  grub2-common initramfs-tools initramfs-tools-bin initramfs-tools-core
  intel-microcode iucode-tool klibc-utils kmod libapparmor1 libargon2-1
  libbrotli1 libcryptsetup12 libdbus-1-3 libdbus-glib-1-2 libdevmapper1.02.1
  libefiboot1 libefivar1 libevdev2 libexpat1 libfreetype6 libfuse3-3
  libgirepository-1.0-1 libglib2.0-0 libglib2.0-data libgudev-1.0-0 libicu70
  libimobiledevice6 libip4tc2 libjson-c5 libklibc libkmod2 libmpdec3
  libnss-systemd libpam-systemd libplist3 libpng16-16 libpolkit-agent-1-0
  libpolkit-gobject-1-0 libpython3-stdlib libpython3.10-minimal
  libpython3.10-stdlib libreadline8 libsqlite3-0 libupower-glib3 libusb-1.0-0
  libusbmuxd6 libxml2 linux-base linux-firmware linux-image-5.15.0-97-generic
  linux-modules-5.15.0-97-generic linux-modules-extra-5.15.0-97-generic
  media-types networkd-dispatcher os-prober pkexec policykit-1 polkitd python3
  python3-dbus python3-gi python3-minimal python3.10 python3.10-minimal
  readline-common shared-mime-info systemd systemd-hwe-hwdb systemd-sysv
  systemd-timesyncd thermald ucf udev upower usbmuxd wireless-regdb
  xdg-user-dirs zstd
Suggested packages:
  libarchive1 default-dbus-session-bus | dbus-session-bus multiboot-doc
  grub-emu mtools xorriso desktop-base console-setup bash-completion fuse3
  libusbmuxd-tools fdutils linux-doc | linux-source-5.15.0 linux-tools
  linux-headers-5.15.0-97-generic iw | wireless-tools python3-doc python3-tk
  python3-venv python-dbus-doc python3.10-venv python3.10-doc binutils
  binfmt-support readline-doc systemd-container libfido2-1
  libtss2-esys-3.0.2-0 libtss2-mu0 libtss2-rc0
Recommended packages:
  firmware-sof-signed
The following NEW packages will be installed:
  amd64-microcode busybox-initramfs cpio dbus dmsetup gettext-base
  gir1.2-glib-2.0 grub-common grub-gfxpayload-lists grub-pc grub-pc-bin
  grub2-common initramfs-tools initramfs-tools-bin initramfs-tools-core
  intel-microcode iucode-tool klibc-utils kmod libapparmor1 libargon2-1
  libbrotli1 libcryptsetup12 libdbus-1-3 libdbus-glib-1-2 libdevmapper1.02.1
  libefiboot1 libefivar1 libevdev2 libexpat1 libfreetype6 libfuse3-3
  libgirepository-1.0-1 libglib2.0-0 libglib2.0-data libgudev-1.0-0 libicu70
  libimobiledevice6 libip4tc2 libjson-c5 libklibc libkmod2 libmpdec3
  libnss-systemd libpam-systemd libplist3 libpng16-16 libpolkit-agent-1-0
  libpolkit-gobject-1-0 libpython3-stdlib libpython3.10-minimal
  libpython3.10-stdlib libreadline8 libsqlite3-0 libupower-glib3 libusb-1.0-0
  libusbmuxd6 libxml2 linux-base linux-firmware linux-image-5.15.0-97-generic
  linux-image-generic linux-modules-5.15.0-97-generic
  linux-modules-extra-5.15.0-97-generic media-types networkd-dispatcher
  os-prober pkexec policykit-1 polkitd python3 python3-dbus python3-gi
  python3-minimal python3.10 python3.10-minimal readline-common
  shared-mime-info systemd systemd-hwe-hwdb systemd-sysv systemd-timesyncd
  thermald ucf udev upower usbmuxd wireless-regdb xdg-user-dirs zstd
0 upgraded, 90 newly installed, 0 to remove and 0 not upgraded.
Need to get 405 MB of archives.
After this operation, 1685 MB of additional disk space will be used.
Do you want to continue? [Y/n]
apt-get linux-image-generic を実行するとストレージが 1685 MB を消費すると書いています。この中では実際に使われないパッケージもあると思いますが、ここでは [Y/n] の Y を選んで全てインストールしてしまいます。
最終的には以下のようなログが表示されています。
Creating config file /etc/default/grub with new version
Setting up grub-gfxpayload-lists (0.7) ...
Setting up linux-image-5.15.0-97-generic (5.15.0-97.107) ...
I: /boot/vmlinuz.old is now a symlink to vmlinuz-5.15.0-97-generic
I: /boot/initrd.img.old is now a symlink to initrd.img-5.15.0-97-generic
I: /boot/vmlinuz is now a symlink to vmlinuz-5.15.0-97-generic
I: /boot/initrd.img is now a symlink to initrd.img-5.15.0-97-generic
Setting up linux-modules-extra-5.15.0-97-generic (5.15.0-97.107) ...
Setting up linux-image-generic (5.15.0.97.92) ...
Processing triggers for libc-bin (2.35-0ubuntu3.6) ...
Processing triggers for initramfs-tools (0.140ubuntu13.4) ...
Processing triggers for dbus (1.12.20-2ubuntu4.1) ...
Processing triggers for linux-image-5.15.0-97-generic (5.15.0-97.107) ...
/etc/kernel/postinst.d/initramfs-tools:
update-initramfs: Generating /boot/initrd.img-5.15.0-97-generic
root@UbuntuTest:/#
更に正しくインストールされたかを確認します。
root@UbuntuTest:/# ls /boot
System.map-5.15.0-97-generic  initrd.img.old
config-5.15.0-97-generic      vmlinuz
grub                          vmlinuz-5.15.0-97-generic
initrd.img                    vmlinuz.old
initrd.img-5.15.0-97-generic- ネットワーク設定パッケージのインストール
ネットワーク設定 netplan をインストールします。これがないとネットワークを動作させることができないため、インストールが必須となります。
root@UbuntuTest:/# apt-get install netplan.io
Reading package lists... Done
Building dependency tree... Done
Reading state information... Done
The following additional packages will be installed:
  iproute2 libatm1 libbpf0 libbsd0 libcap2-bin libelf1 libmd0 libmnl0
  libnetplan0 libpam-cap libxtables12 libyaml-0-2 python3-netifaces
  python3-yaml
Suggested packages:
  iproute2-doc network-manager | wpasupplicant openvswitch-switch python3-rich
  iw
The following NEW packages will be installed:
  iproute2 libatm1 libbpf0 libbsd0 libcap2-bin libelf1 libmd0 libmnl0
  libnetplan0 libpam-cap libxtables12 libyaml-0-2 netplan.io python3-netifaces
  python3-yaml
0 upgraded, 15 newly installed, 0 to remove and 0 not upgraded.
Need to get 1844 kB of archives.
After this operation, 5731 kB of additional disk space will be used.
Do you want to continue? [Y/n] Y
このパッケージをインストールするときに依存パッケージも同時にインストールします。
最終的には以下のようなログを表示しています。
Setting up iproute2 (5.15.0-1ubuntu2) ...
debconf: unable to initialize frontend: Dialog
debconf: (No usable dialog-like program is installed, so the dialog based frontend cannot be used. at /usr/share/perl5/Debconf/FrontEnd/Dialog.pm line 78.)
debconf: falling back to frontend: Readline
debconf: unable to initialize frontend: Readline
debconf: (Can't locate Term/ReadLine.pm in @INC (you may need to install the Term::ReadLine module) (@INC contains: /etc/perl /usr/local/lib/x86_64-linux-gnu/perl/5.34.0 /usr/local/share/perl/5.34.0 /usr/lib/x86_64-linux-gnu/perl5/5.34 /usr/share/perl5 /usr/lib/x86_64-linux-gnu/perl-base /usr/lib/x86_64-linux-gnu/perl/5.34 /usr/share/perl/5.34 /usr/local/lib/site_perl) at /usr/share/perl5/Debconf/FrontEnd/Readline.pm line 7.)
debconf: falling back to frontend: Teletype
Setting up netplan.io (0.106.1-7ubuntu0.22.04.2) ...
Processing triggers for libc-bin (2.35-0ubuntu3.6) ...
Processing triggers for dbus (1.12.20-2ubuntu4.1) ...
root@UbuntuTest:/#- ルートファイルシステムを戻す
これから fstab と ネットワークの設定ファイルを編集します。mmdebstrapで作成したルートファイルシステムにはフルスクリーンエディタがインストールされていないため、ここから chroot を exit して元のルートファイルシステムで作業します。
root@UbuntuTest:/# exit
exit
- fstab の設定
fstab を編集しますがインストール先ストレージの uuid が必要となりますので fstab 編集前に blkid というコマンドで調べておきます。
$ sudo blkid /dev/sdb
/dev/sdb: PTUUID="a7869359-353e-4675-9d4a-4faaf754fd9d" PTTYPE="gpt"ここのPTUUID=”a7869359-353e-4675-9d4a-4faaf754fd9d” をメモしておきます。
次に /mnt/etc/fstab をフルスクリーンエディタで開いて以下の内容に編集します。以下の内容で実際に必要なのは # が付かない最終行だけですが、コメントとして残しておきます。
$ sudo vi /mnt/etc/fstab

# (fstabを以下の内容に編集します)
# /etc/fstab: static file system information.
#
# Use 'blkid' to print the universally unique identifier for a
# device; this may be used with UUID= as a more robust way to name devices
# that works even if disks are added and removed. See fstab(5).
#
# <file system> <mount point>   <type>  <options>       <dump>  <pass>
# / was on /dev/sda2 during curtin installation
/dev/disk/by-uuid/a7869359-353e-4675-9d4a-4faaf754fd9d / ext4 defaults 0 1
ここで blkid で調べた uuid は /dev/disk/by-uuid/ から始まる文字列で使用します。
- ネットワークの設定
次に netplan を使用したネットワーク設定ファイルを編集します。ここでのネットワークは dhcp を使用することを前提とします。ここでも # はコメント行となります。
$ sudo vi /mnt/etc/netplan/99_config.yaml

# (99_config.yaml を以下の内容に編集します)
# This is the network config written by 'subiquity'
network:
  ethernets:
    ens33:
      dhcp4: true
  version: 2
grub インストール (インストールメディアの 「Try」 でコマンド実行)
次は grub のインストールですが、その作業はインストールメディアの Try Ubuntu で行います。この理由は grub 更新時に /boot/grub/grub.cfg が生成されるのですが、そのファイル編集を省略して簡素化させるためです。
今まで作業していた 「インストール済みUbuntu」を一度シャットダウンして、インストール対象だった外付けストレージを一度 /dev/sda として認識できるように SATA のケーブルを接続しなおします。その後、インストールメディア(ここではDesktop用のUbuntu)で起動し、Try Ubuntu のターミナルから以下のようにコマンドを実行します。
$ sudo mount /dev/sda /mnt
$ sudo mount --bind /dev /mnt/dev
$ sudo mount --bind /sys /mnt/sys
$ sudo mount --bind /proc /mnt/proc
$ sudo chroot /mnt
root@ubuntu: /#
ここまでのコマンドラインは上記で一度説明していますので、そちらを参照してください。
root@ubuntu: /# grub-install /dev/sda
Installing for i386-pc platform.
Installation finished. No error reported.
grub-install /dev/sda で1番目のパーティションに grub(実行イメージ)をインストールします。もともと1番目のパーティションはフォーマットしていませんでしたが、そのまま grub のイメージを grub-install で書き込みます。また、よく間違えそうな操作として grub-install /dev/sda1 とは打ち込まず、sda を指定するだけで grub-install が適切なパーティションにインストールしてくれます。
root@ubuntu: /# update-grub
Sourcing file `/etc/default/grub'
Sourcing file `/etc/default/grub.d/init-select.cfg'
Generating grub configuration file ...
Found linux image: /boot/vmlinuz-5.15.0-97-generic
Found initrd image: /boot/initrd.img-5.15.0-97-generic
Warning: os-prober will be executed to detect other bootable partitions.
Its output will be used to detect bootable binaries on them and create new boot entries.
done
root@ubuntu: /#
update-grub を実行して起動時に grub が動作するようにします。この結果として、/boot/grub/grub.cfgが生成されていることを確認します。
root@ubuntu: /# ls /boot/grub/grub.cfg
/boot/grub/grub.cfg
インストールした小さな Ubuntu を起動する
インストールメディアのUbuntuをシャットダウン後、メディアを取り外します。
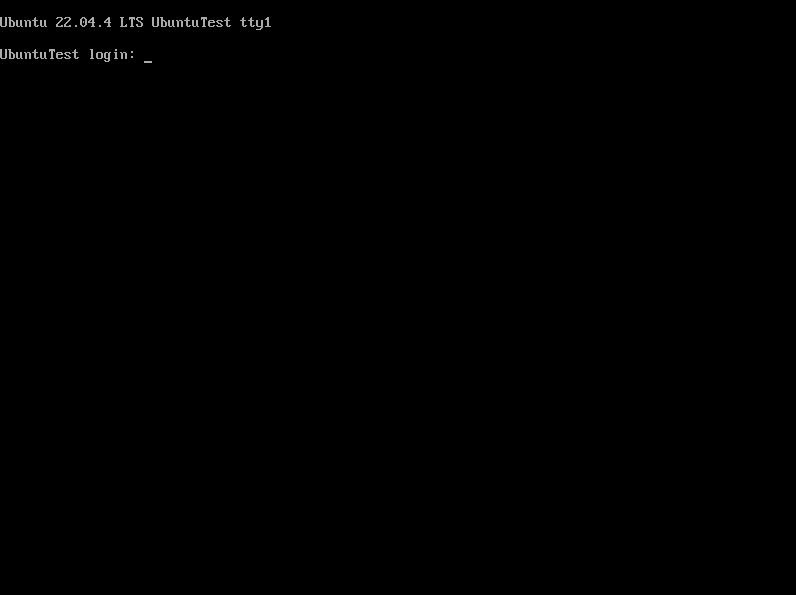
その後、起動するとインストールした小さな Ubuntu が表示されます。


